
MCP Inspector: Understand and Debug MCP servers
Table of Contents
While I was writing my draft on how to build your own MCP Server I realised that first I need to talk you through how to interact with MCP servers. I will provide you with detailed steps on how to do just that using the MCP Inspector. It is similar to how you’d use one of the many REST clients.
If you are wondering what Model Context Protocol (MCP) is or why you need it, then you might find my MCP Introduction helpful.
How to start the MCP Inspector
You can start the inspector by using npx (part of npm):
npx @modelcontextprotocol/inspector
Note: since 0.14.1 the inspector defaults to requiring a generated authentication token. i.e. you will have to use the URL that is printed to the console.
While you could disable that by setting DANGEROUSLY_OMIT_AUTH to true, this would make you vulnerable to attacks via a browser as outlined in CVE-2025-49596 (I’ve updated this paragraph after previously assuming this would only be an issue when accepting external network traffic). I’m explaining more on that in Browser Attack Vectors Against Local Developer Tools.
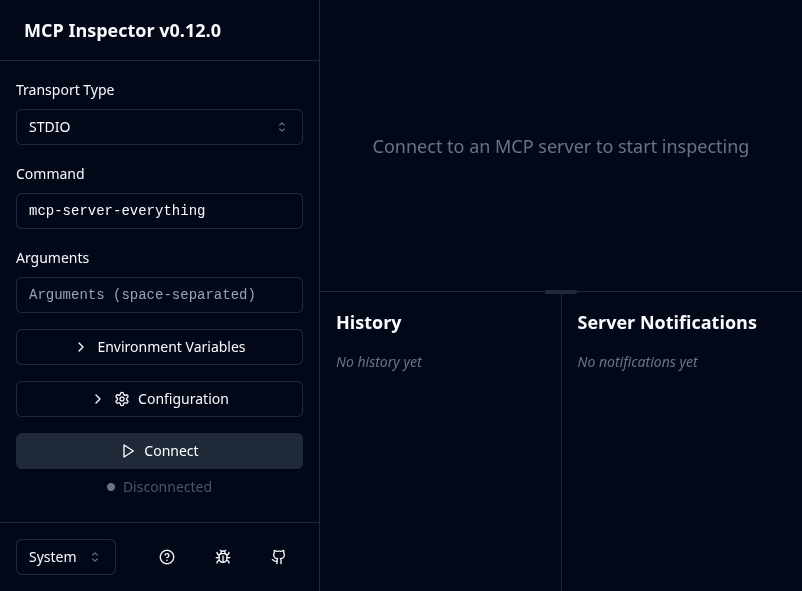
You can then connect to an MCP server using one of the available transport modes.
I will be using the everything MCP server as an example. It aims to implement all of the features of MCP.
Connect to MCP server via STDIO
In the stdio transport mode, the MCP client starts the MCP server and communicates with it through the standard input and output stream.
That way, the MCP server doesn’t need to be started separately and it’s life cycle is controlled by the MCP client.
For us that means the MCP server will be started by the inspector.
Use the following details to connect to the example server via STDIO:
| Configuration Option | Value |
|---|---|
| Transport Type | STDIO |
| Command | npx |
| Arguments | @modelcontextprotocol/server-everything |
Then hit Connect.
That will in fact run npx @modelcontextprotocol/server-everything and start the MCP server in STDIO mode. It then communicate with the process via process’s standard input and output.
Inspect and run tools
Then select the Tools menu:

Followed by the List Tools:

As a result you should see the tools that the MCP server provides:
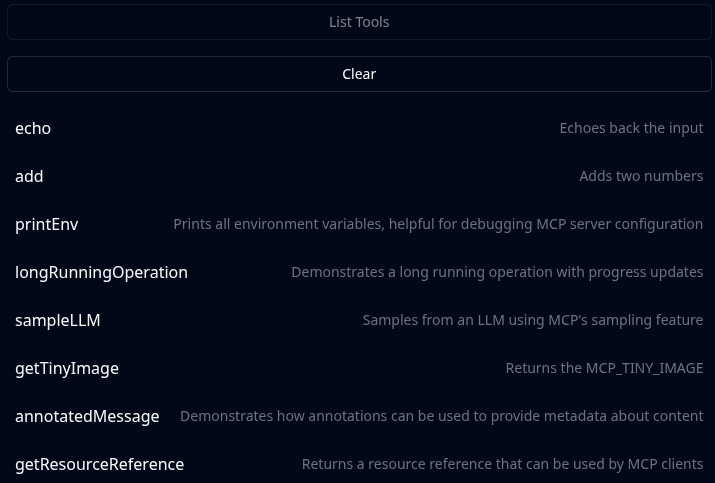
If you want to list the tools again, simply click Clear as that will re-enable the List Tools button.
We can find out more details about the tools by expanding the tools/list card in the History:
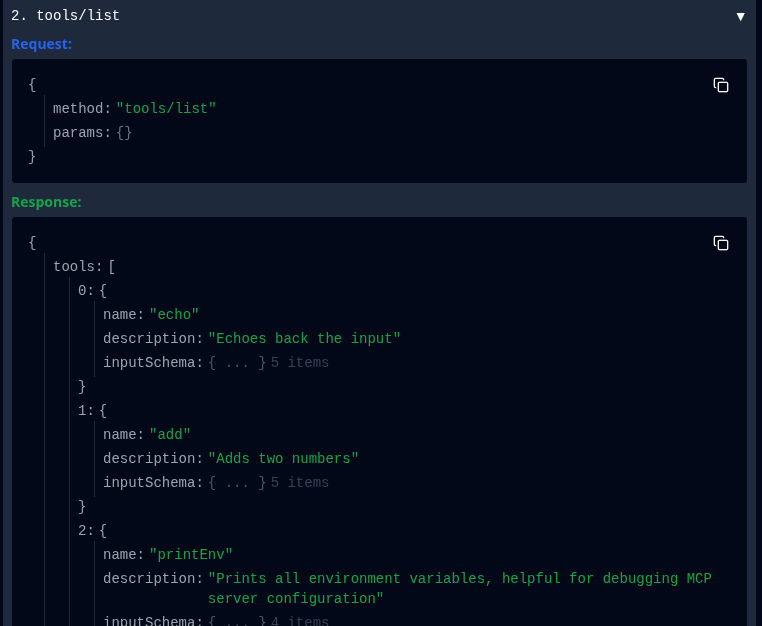
In particular the inputSchema is important for describing and validating the parameters, to the user as well as the AI. For the add tool the full schema looks like this:
{
    "name": "add",
    "description": "Adds two numbers",
    "inputSchema": {
        "type": "object",
        "properties": {
            "a": {
                "type": "number",
                "description": "First number"
            },
            "b": {
                "type": "number",
                "description": "Second number"
            }
        },
        "required": ["a", "b"],
        "additionalProperties": false,
        "$schema": "http://json-schema.org/draft-07/schema#"
    }
}
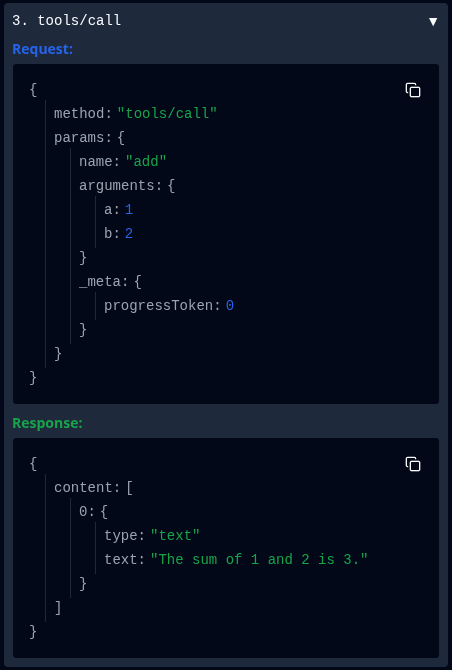
If you now click on the add tool:

Then run the tool:
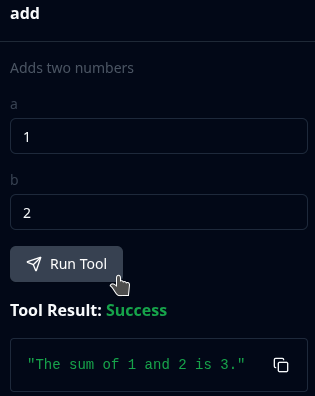
The tools/call history card reveals more details here too:
Connect to MCP server via Streamable HTTP
An alternative to the STDIO transport mode is to connect to the MCP server via Streamable HTTP. In that transport mode we will start the server separately. Or we could of course also connect to an already running MCP server.
Run the everything MCP server in Streamable HTTP mode:
npx @modelcontextprotocol/server-everything streamableHttp
That will make the MCP server available under http://localhost:3001/mcp (while the port is logged, the /mcp path needs to be know but is the same for most MCP servers in that transport mode).
Therefore the connection details for the inspector are:
| Configuration Option | Value |
|---|---|
| Transport Type | Streamable HTTP |
| URL | http://localhost:3001/mcp |
You need to be quick, because the MCP server will shut itself down if it hasn’t received any connection.
Once connected, everything will be the same as if it was connected via STDIO.
From the logs we can actually see that it “upgrades” the connection to SSE:
Starting Streamable HTTP server…
MCP Streamable HTTP Server listening on port 3001
Received MCP POST request
Session initialized with ID: 4efa6cd7-39b7-4647-bfb1-f393cac4845b
Received MCP POST request
Received MCP GET request
Establishing new SSE stream for session 4efa6cd7-39b7-4647-bfb1-f393cac4845b
Whether that SSE upgrade will happen depends on the MCP server.
Connect to MCP server via SSE
Similar to Streamable HTTP, you could also connect to an MCP server in the Server-Sent-Events (SSE) transport mode. Although that should become less popular, given that this transport mode is now deprectated (since March 2025).
Run the everything MCP server in SSE mode:
npx @modelcontextprotocol/server-everything sse
That will make the MCP server available under http://localhost:3001/sse.
Given that, the connection details for the inspector are:
| Configuration Option | Value |
|---|---|
| Transport Type | SSE |
| URL | http://localhost:3001/sse |
Again you need to be quick, because the MCP server will shut itself down if it hasn’t received any connection.
Once connected, everything will be the same as if it was connected via STDIO.
Conclusion
I hope you enjoyed the short tour through the MCP inspector and it may have made the different transport modes more tangible.
While I very much focused on tools, other aspects like prompts are also worth exploring.
Finally there are already a lot of MCP servers available that you could try using the inspector before letting it loose on your AI agent.
Alternatively, build your own server using the MCP Python SDK.